HOMEMADE SAUERKRAUT
An excellent source of healthy probiotics
What you will need:
- 1-2 heads of cabbage, red and/or green. (NOTE: If you don’t have glass or stone weights to keep the cabbage submerged underneath the brine, you’ll need to reserve two leaves and set them aside)
- 1-2 Tbsp sea salt
- ¼ cup dulse seaweed flakes (optional)
- Filtered water
- 1 half-gallon glass jar with a lid (an airlock lid is preferable, but not necessary), or a ceramic crock with a fermenting weight
Instructions:
Shred the cabbage head into ribbons with a knife or mandolin into 1/4” strips. Note that you can cut the cabbage into large chunks or finely chop it (it is your preference); in any case, it will still ferment. Just know that larger pieces may take longer to ferment than finely chopped pieces or shreds. Using a food processor is another way to chop the cabbage finely.

Place the shredded/chopped cabbage, sea salt and dulse seaweed (if using) into a large, unbreakable bowl. Allowthe mixture set for 1-2 hours to allow the salt to break down the cell walls of the cabbage. While this is happening, you will begin to see the cabbage releasing its juices. During this time, use your (clean) hands to mix and squeeze the cabbage to further release the cabbage juice. Do this several times during the 1-2 hours. When you start to see plenty of juice collecting at the bottom of the bowl and the cabbage looks a bit translucent, proceed to the next step.

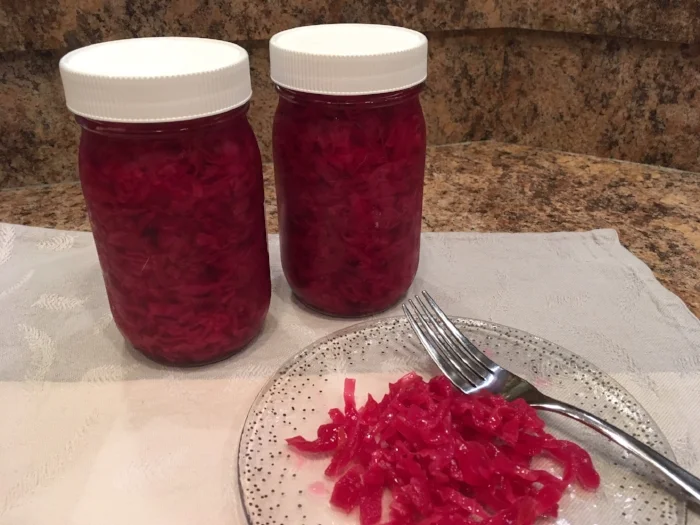
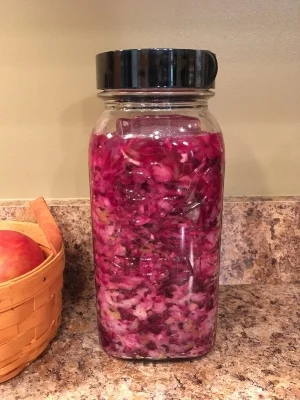
Pack the glass jar or ceramic crock with the cabbage mixture. Press the cabbage down to minimize air bubbles and to release additional juice from the cabbage so that the mixture is covered with liquid. It helps to use a thick, wooden dowel for this step. Pack the jar/crock until it is no higher than 2 inches from the top. (The cabbage will expand significantly as it ferments.)

Place the weight or the reserved cabbage leaveson top to help press down the mixture. The cabbage should be fully submerged in its own juices; if not then top with additional brine until the contents are fully covered (see “extra brine” recipe below).
If using a glass jar, place the cap on the jar and store it at room temperature, preferably away from direct light, until you start seeing bubbles. Some of the juice may escape, and that is okay. If the kraut starts to look a little “dry”, you can add a bit more brine (see recipe below) to cover the mixture, and then screw the lid back on tightly.
If you’re not using an airlock lid, be sure to burp the jar every so often to release the fermentation gases that will be forming. If you’re fermenting in a warmer climate/temperature, you will need to keep an eye on it and check it every day. Warmer temperatures allow for faster fermentation. If you are fermenting at cooler temperatures, fermentation will take longer and you can burp your jar every 2 to 3 days by twisting the cap open and then retightening it. If you’re using an airlock lid, there is no need to burp the jar. Taste the liquid from time to time. If it is to your liking, your sauerkraut is ready. If you like a stronger fermentation, keep going and burp the jar every few days until the taste is to your liking. Typically, you can achieve a good fermentation in about 30 days, but feel free to let it go a week or two longer if you prefer a more tangy flavor.
Your sauerkraut should smell ripe, not rotten, and the liquid should have a pleasing sour flavor to it. Keep your sauerkraut in the fridge and enjoy it over the weeks and months ahead. It will keep for several months in the refrigerator.